

How To Setup Raspberry Pi Zero W Headless WiFi
The following instructions will work anytime, you don't necessarily have to follow them for the first boot - this is just a very convenient way to get your Raspberry Pi onto a network without using any plug-in peripherals like a keyboard, mouse or monitor.
raspberry pi zero, raspberry pi zero w headless setup, headless setup linux, setup mac,setup noobs,setup on mac os,setup ssh,setup stretch,setup usb,setup windows,setup wpa2WHAT IS "HEADLESS," ANYWAY?
A computer setup without a monitor is said to be running headless. You might want to do this if you're installing your Pi into some project, or want to keep power-usage and cost minimal. This kind of setup is what the Pi Zero W was built for. The idea is that you can still access your Pi's terminal interface over your network using a protocol called SSH.
All we need to do is get our Pi set up with the right WiFi credentials and we'll be able to remotely access it through a terminal program, as if we were using the terminal Pi's own desktop. What's more, we'll get our Pi connected to WiFi without ever having to plug in a monitor, keyboard or mouse to configure it.
YOU WILL NEED:
- A Raspberry Pi with WiFi on-board - I'm using a Raspberry Pi Zero W but the steps will be the same for Raspberry Pi 3 Model B.
- A micro SD card with SD adapter.
- A power supply for your Pi; we recommend the official supply.
- A computer connected to the same network you wish to connect your Pi to.
- Raspbian Jessie or Jessie Lite, download from the RPi foundation (they have a complete installation guide if you run into trouble)
- PuTTY, a free SSH program. If you're on OSx or Linux, you can already SSH from your terminal.
SETUP YOUR WIFI CREDENTIALS
Insert your SD card with Raspbian into it into your computer and open the SD card from your file explorer - the drive will be labeled boot.
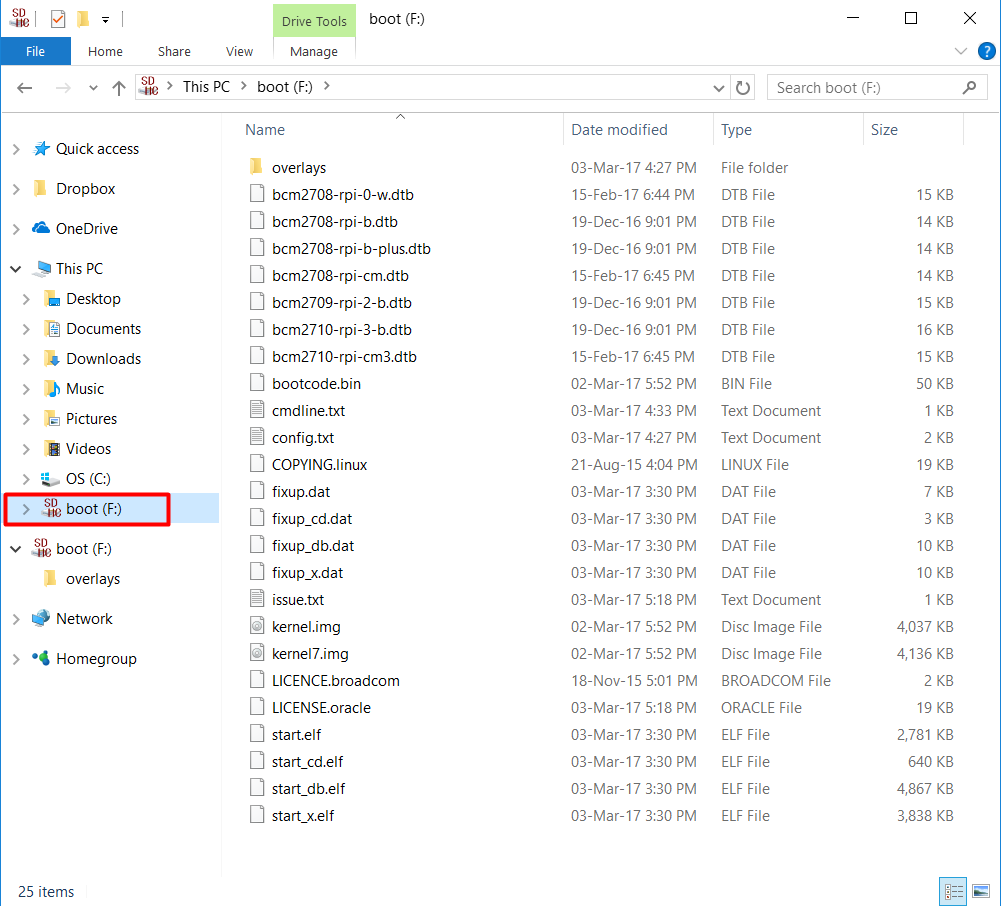
Within the boot directory, Right-Click > New > Text Document and rename the document to wpa_supplicant.conf - Make sure that you change the file extension from .txt to .conf - You will be prompted to confirm the extension change.

With the empty file created, Right-Click on it an select open. You may be prompted to select a program you'd like to open the file with - just choose Notepad.
This is where we enter our WiFi details. Enter the following text into the file, replacing the placeholder text with your own details, including country.
country=AU
ctrl_interface=DIR=/var/run/wpa_supplicant GROUP=netdev
update_config=1
network={
 ssid="MyWiFiNetwork"
 psk="aVeryStrongPassword"
 key_mgmt=WPA-PSK
}
SSID is the name of your WiFi network, and psk is your WiFi password.

ENABLE SSH
By default, the current version of Raspbian has SSH disabled. We're going to enable it here.
Create an empty file in the boot directory called ssh
Make sure that the file has no file extension, i.e. remove the .txt if you created the file by selecting New > Text File.

CONNECT
Your Pi is now ready for startup. Eject the SD card from your computer and insert it into your Pi. Power up your Pi (we recommend an official power supply) and wait a few moments for the initial boot to complete. On your computer, open up PuTTY.
We know that the default hostname (the name of the machine) for a fresh Raspbian install is raspberrypi, so in the Host Name (or IP address) field enter raspberrypi. This searches for machines on that name on the local network. Once a connection is established, you'll be prompted by PuTTY to accept the connection to the new machine. You should see a black terminal prompting for a login. Enter the default username: pi and the default password: raspberry
If you get an error saying the host does not exist, try the troubleshooting steps.


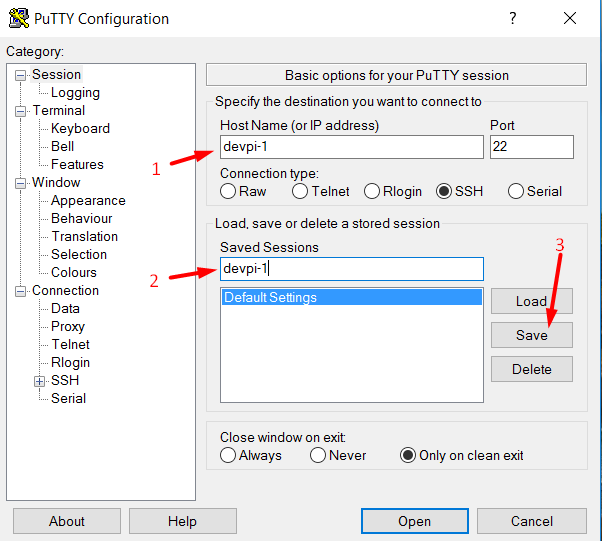
It's not a clever idea to leave everything at their defaults - for instance, everybody knows the default username and password for Raspbian. What's more, if you want to deploy another Pi onto your network, it'll have the same default hostname as your first one. How will you know which Pi you're connecting to? This is a good opportunity to run sudo raspi-config and at least change the hostname. Once you've saved these changes and rebooted your Pi, save the SSH details within PuTTY - enter the new hostname in the Host Namefield and in the Saved Sessions field and click Save. Now you can quickly connect to your Pi, and keep track of multiple Pis from within PuTTY.
Here I changed the hostname of my Pi to devpi-1, so I'm creating a PuTTY session to reflect that.
SSH TROUBLESHOOTING
If PuTTY tells you that the host does not exist, and your Pi is powered and the WiFi configured correctly:
- Make sure you don't have any other Raspberry Pis on your network with the hostname raspberrypi.
- Try connecting to raspberrypi.local
- If the previous step doesn't work for you, proceed with the following.
- Windows: open command prompt as an administrator:
- Windows 10: press Windows-Key + X to bring up the power-user menu. Select Command Prompt (Admin)
- Earlier versions: Start > Accessories > Command Prompt (Admin)
- Execute the command ipconfig /flushdns
If you want permanent SSH access, but it's disabled after you reboot the Pi and you have to recreate the "ssh" file again to get it back:
- Create the "ssh" file again as described above
- Run the command sudo raspi-config
- Go to 5 Interfacing Options and press enter
- Select <Yes> and press enter
- Select <Finish> and press enter
- Reboot your Pi to ensure it worked
APPENDIX
WHY DOES THIS WORK?
On startup, Raspbian checks the contents of the boot directory for specific files:
- If it detects a file called wpa_supplicant.conf, Raspbian will copy the file into /etc/wpa_supplicant, replacing any existing wpa_supplicant.conf file that may be there. The file in the boot directory is then removed.
- If an empty file named ssh is detected, Raspbian will adjust it's settings to accept SSH connections. The ssh file is then deleted.
This means that if something goes wrong we can always get our Pi back onto a wifi network by repeating the steps above!
raspberry pi zero, raspberry pi zero w headless setup, headless setup linux, setup mac,setup noobs,setup on mac os,setup ssh,setup stretch,setup usb,setup windows,setup wpa2
raspberry pi zero, raspberry pi zero w headless setup, headless setup linux, setup mac,setup noobs,setup on mac os,setup ssh,setup stretch,setup usb,setup windows,setup wpa2
If you wish, you can include more than one network block. wpa_supplicant will select the network that it rates as the best choice based off:
- Order of network blocks in the wpa_supplicant.conf file
- Security level (WPA2 is preferred)
- Signal strength
Doing so will look something like this:
# Network 1
network={
    ssid="SSID1"
    psk="password1"
    key_mgmt=WPA-PSK
}

# Network 2network={
    ssid="SSID2"
    psk="password2"
    key_mgmt=WPA-PSK
}

Post a Comment